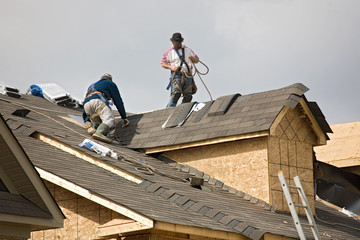
A home is only as strong as its roof. Roofing plays a vital role in keeping families safe, comfortable, and protected from the elements. It not only adds structural integrity but also enhances curb appeal and property value. With so many options available today, understanding the importance of roofing, its materials, and maintenance can help homeowners make informed decisions that ensure durability and style.

The Importance of Quality Roofing
The roof is the first line of defense against weather conditions. From heavy rain and strong winds to scorching sun and falling debris, a durable roof shields the entire home. Beyond protection, roofing also provides insulation, helping regulate indoor temperatures and reducing energy costs.
Poor-quality or damaged roofing, on the other hand, can lead to leaks, mold growth, structural damage, and costly repairs. This makes choosing and maintaining the right roof a critical part of homeownership.
Popular Roofing Materials
Different roofing materials offer unique benefits, and the right choice often depends on climate, budget, and design preferences.
Asphalt Shingles
One of the most widely used options, asphalt shingles are cost-effective and easy to install. They come in various styles and colors, making them versatile for different home designs.
Metal Roofing
Metal roofs are durable, energy-efficient, and resistant to extreme weather. They have a longer lifespan compared to many traditional materials and can give a modern, sleek appearance to a home.
Tile Roofing
Tile roofs offer timeless beauty and excellent durability. They are especially valued for their resistance to fire and heat, making them ideal for warmer climates.
Slate Roofing
Slate is a premium material known for its natural beauty and long lifespan. While it requires a higher investment, it offers unmatched durability and elegance.
Wood Shakes and Shingles
Wood roofing provides a rustic, natural look. It offers good insulation properties but requires regular maintenance to prevent issues like rot and insect damage.
Each roofing material has its strengths, and selecting the right one ensures long-term performance and aesthetic appeal.
Roofing Styles That Enhance Homes
Beyond materials, roofing styles influence the overall look and functionality of a home.
- Gable roofs feature a simple triangular design, making them practical and cost-effective.
- Hip roofs slope on all sides, offering extra strength and resistance to high winds.
- Flat roofs provide a modern appearance and space for rooftop gardens or solar panels.
- Mansard roofs add architectural character with their steep slopes and additional living space.
The choice of style can significantly impact both the design and performance of a home.
The Role of Proper Installation
Even the best roofing materials will not perform well if installed improperly. Professional installation ensures that every layer of the roofing system, from underlayment to flashing, is correctly placed. Proper installation prevents leaks, improves energy efficiency, and extends the lifespan of the roof.
Homeowners should prioritize quality workmanship, as poor installation can lead to costly issues down the road. A roof is an investment, and it deserves the attention of skilled professionals.
Routine Roof Maintenance
Like any part of a home, roofs require regular maintenance to stay in good condition. Simple actions can help extend their life and prevent expensive repairs.
- Inspect regularly for missing shingles, cracks, or signs of wear.
- Clean gutters to prevent water buildup and potential leaks.
- Remove debris like leaves and branches that can trap moisture.
- Check flashing around chimneys, vents, and skylights for secure sealing.
Addressing minor issues early prevents them from becoming major problems. Regular maintenance also helps homeowners stay ahead of seasonal challenges, such as heavy rains or strong winds.
Signs a Roof May Need Replacement
Even with proper care, every roof eventually reaches the end of its lifespan. Recognizing the warning signs helps homeowners plan for timely replacement.
- Frequent leaks or water damage inside the home.
- Shingles that are cracked, curling, or missing.
- Noticeable sagging areas on the roof.
- Excessive moss, mold, or algae growth.
- An aging roof that has surpassed its expected lifespan.
Replacing a roof before severe damage occurs protects the home’s structure and saves money in the long run.
Energy Efficiency and Roofing
Modern roofing is not only about protection but also about energy efficiency. Certain materials reflect heat, helping to reduce cooling costs during warmer months. Proper insulation beneath the roof also keeps homes warmer in winter.
Energy-efficient roofing not only benefits homeowners through reduced bills but also contributes to a more sustainable lifestyle. Choosing materials and colors that align with climate conditions maximizes these benefits.
Boosting Curb Appeal with Roofing
A roof makes up a large part of a home’s exterior appearance. Choosing the right color, material, and style can dramatically improve curb appeal. A well-maintained roof signals care and quality, increasing overall property value.
For homeowners planning to sell, investing in new roofing can attract buyers and provide a strong return on investment. Beyond functionality, roofing is an aesthetic feature that enhances the charm and character of any property.
Roofing is more than just a shelter over a home—it is an essential feature that provides safety, efficiency, and style. From choosing the right material and design to ensuring proper installation and maintenance, every decision impacts the strength and longevity of a roof.
By investing in quality roofing and staying proactive with upkeep, homeowners can protect their property, improve energy efficiency, and enhance curb appeal for years to come. A strong roof is not only a smart investment but also the foundation of a safe and beautiful home.